Thank you for downloading CySight, incorporating:
Real-Time - Real-time analytics for QoS, performance optimization, compliance and root-cause discovery.
Real-Time provides enhanced troubleshooting and forensic capabilities for today’s complex networks. CySight's real-time engine is also an intuitive intelligent agent that learns and builds a baseline of the traffic flows occurring on any network and can alert network management on bursts, scans and peer-to-peer (P2P) traffic. The level of granularity and the ability to drill into the traffic is unprecedented with every flow being stored for every minute for at least seven days.
Long-Term - Historical trending for capacity planning, traffic accounting and service level analysis.
Long-Term trending precessing provides a robust fully automated end-to-end Network knowledge base to enable you to baseline, plan and profile the use of any element within your network. Long-Term trending equips management with the knowledge to better understand IT resource and network usage enabling an organization to maximize operational efficiencies.
Notes
- Distribution of this software in any shape or form is strictly prohibited!
- This product has been tested on Centos and RedHat 7.9
- Subject to CySight Licence and 3rd Party Terms and Conditions.
It is recommended that CySight be installed on a dedicated PC or server.
NetFlow
NetFlow v5, v7, v9, v10, IPFiX, sflow, ixflow or equivalent must be enabled.
Operating System
Red HAT / Centos Linux 7.9
Database Engine
MySQL - Provided with CySight Installation
Note that existing MySQL installations should be removed in order to install CySight!
Web Server
Apache Tomcat - Provided with DigiToll CySight Installation
Java
Java - Provided with DigiToll CySight Installation
Hardware (Recommended)
CPU - 2GHz (8 Cores recommended for larger environments)
RAM - 2GB (4 GB recommended for larger environments)
HDD - 100GB
Ethernet Port
Linux
Installing CySight on a Linux O/S requires unique configurations to be defined during the operating system’s installation process. These configurations differ, depending on the operating system in use. CySight
Once the Operating System is installed and configured and the system has rebooted, you can install the CySight Server on your Windows or Linux operating system.
The following instructions will take you step by step through the CySight installation process:
Linux Edition
To install CySight on your Linux O/S:
Enter the Linux O/S.
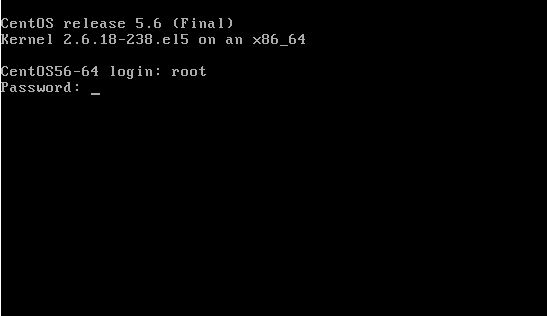
You are prompted to enter a Password.
Type the password you defined during the Linux O/S installation.
[ENTER]
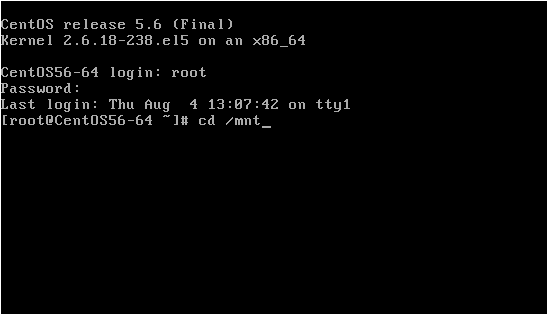
Type: cd /mnt
If you have received CySight for Linux on a CD
[ENTER]
Type: mkdir cdrom
[ENTER]
Type: mount /dev /cdrom /mnt/cdrom
[ENTER]
Type: cd cdrom
[ENTER]
If you have downloaded CySight for Linux
Untar the package to a temporary directory
Type: install.sh
[ENTER]
The following is displayed:
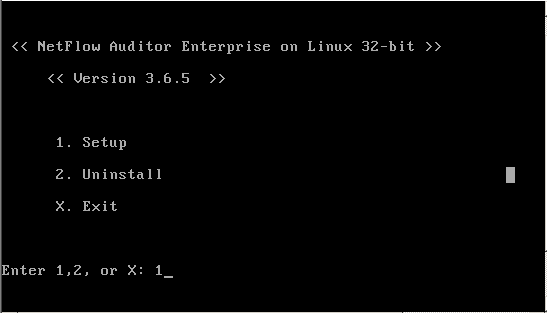
Type: 1
[ENTER]
CySight sometimes needs to make a change to the Linux configuration to enable the successful installation of MySQL 5. If CySight has made this change you will be prompted to reboot the server. Repeat steps 1-9 following the reboot.
- SMTP Server:
This is the server address that is to be used for CySight email reporting and alerting functionality. If the CySight server has been configured as an SMTP server enter default [localhost] or the IP address of your SMTP server. - CySight Report Sender Email Address:
This is the email account that is to be used for sending email reports from the DigiToll server. Example [email protected]. - Listening Port of NetFlow 1: [2055]
Recommended default port 2055. For CySight Enterprise Version v3.6.5 and earlier. - (Optional) Listening Port of NetFlow 2: [2056]
Recommended default port 2056. For CySight Enterprise Version v3.6.5 and earlier.
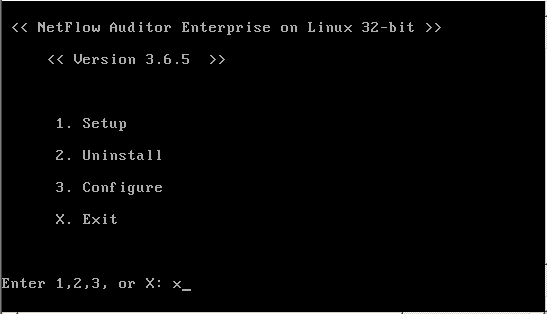
Type: x
[ENTER]
Acquire license keys from cysight
CySight will not work until license keys have been obtained from cysight or one of its agents. Please register here for an evaluation license key.
Configuration (Linux)
The configuration menu enables access to further back-end configuration options. This menu applies only to CySight v3.6.7 or earlier. For CySight v3.6.8, many configuration will be done solely in Front End. To access the Configuration menu
Type: 3
[ENTER]
The following menu is displayed:
1 IP Address Configuration
2 NetFlow UDP Port
3 Email Configuration
4 Restart CySight
X Exit
IP Address Configuration
During installation CySight is configured with the IP Address of the server. However if the IP address is changed CySight needs to be reconfigured with the new IP address.
Type: 1
Enter new IP address
[ENTER]
NetFlow UDP Port
Enter the number of UDP ports required for NetFlow Collection:
When configuring CySight for multiple NetFlow streams on an Enterprise edition of CySight you must configure 1 port for each NetFlow stream.
Listening Port of NetFlow 1: [2055]
Recommended default port 2055
Netflow version for this collector: 5[1, 5, 7, or 9]:
Netflow version, default as Netflow version 5
(Optional) Listening Port of NetFlow 2: [2056]
Recommended default port 2056
(Optional)Netflow version for this collector: 5[1, 5, 7, or 9]:
Netflow version, default as Netflow version 5
Email Configuration
SMTP Server:
This is the server address that is to be used for CySight email reporting and alerting functionality. If the CySight server has been configured as an SMTP server enter default [localhost] or the IP address of your SMTP server.
CySight Report Sender Email Address:
This is the email account that is to be used for sending email reports from the CySight server. Example [email protected].
Restart CySight
See Getting Started