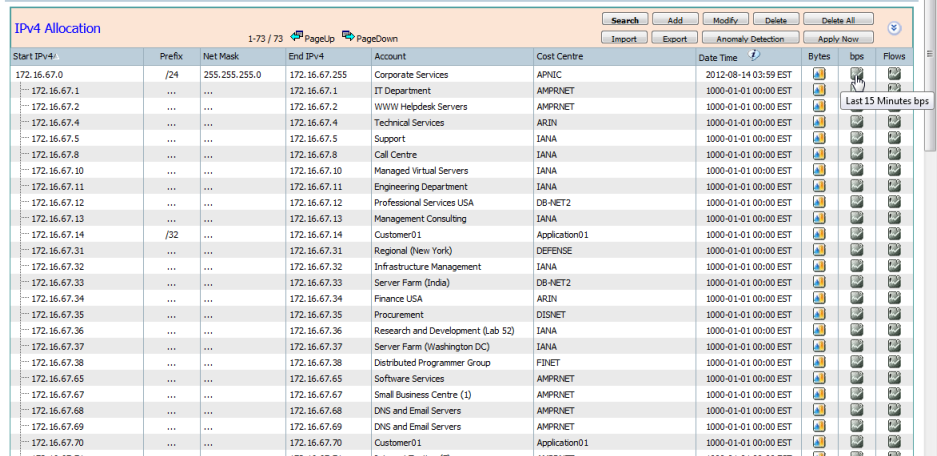
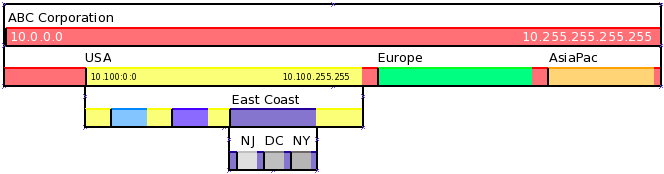
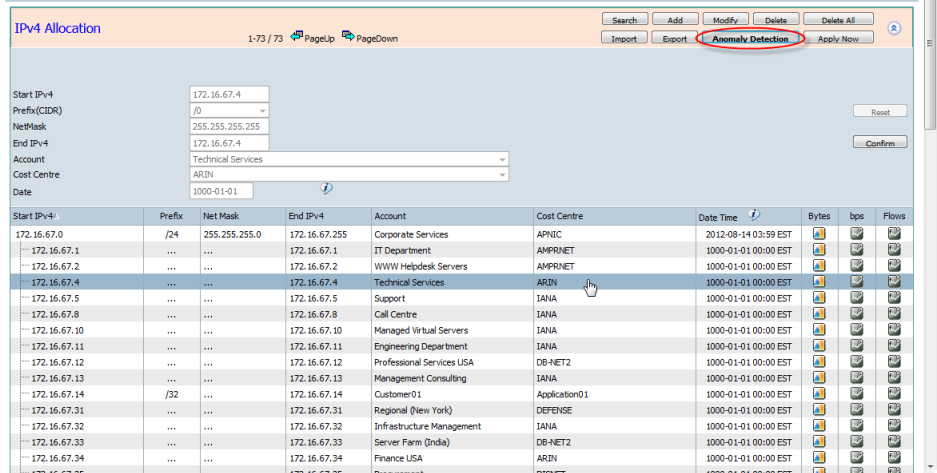
This screens allows association between and maintenance of IPv4 segments with Accounts and CostCenters.
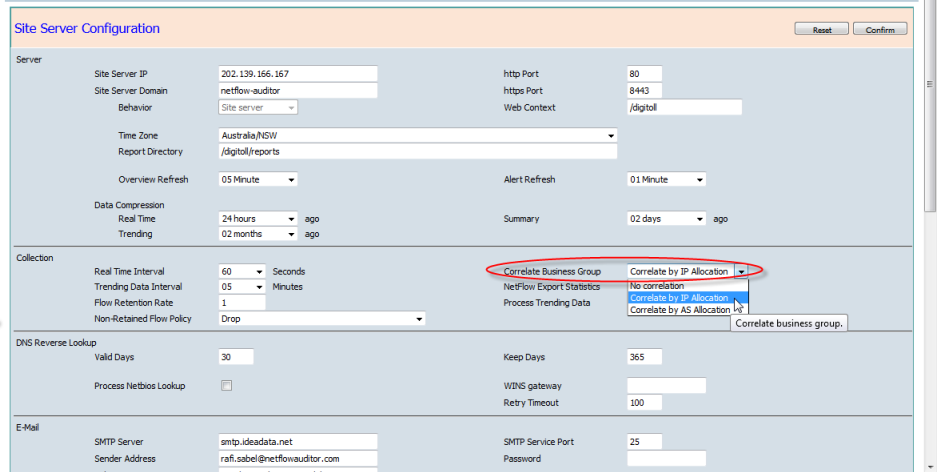
The "Correlate Business Group" option in Configuration > Administrator > Site Configuration must be set to "Correlate by IP Allocation" for Accounts and Cost Centers to be associated with IPv4 Allocations.
Command Overview
- Search
- Add
- Modify
- Delete
- Delete All
- Import
- Export
- Anomaly Detection
Each allocation will be tagged according to the Account and Cost Center assigned to it regardless of being a subset of a larger allocated range or not. When an IPv4 address is a subset of another range but is unallocated the unallocated address will be tagged with the Account and Cost Center of its parent range.
IPv4 allocations must be"non-overlapping ranges" where one IPv4 segment can include another one.
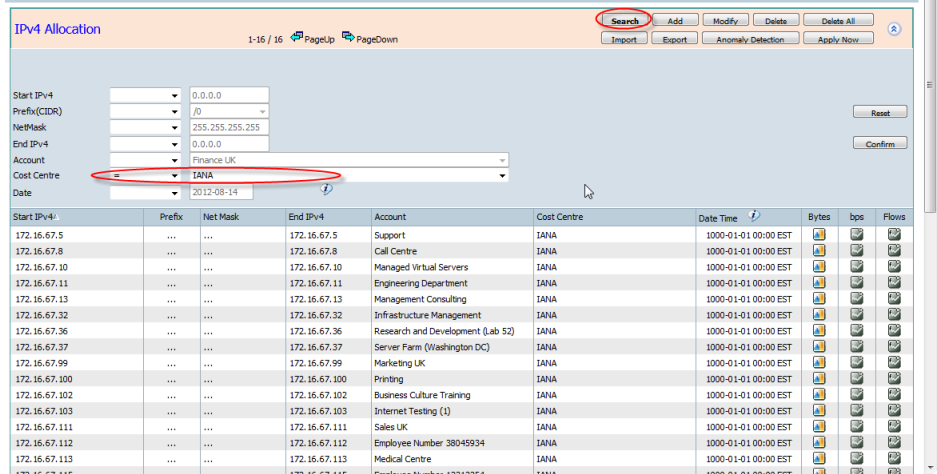
- Search - The "Search" button will expand the Search panel.
Start IPv4, Prefix(CIDR), NetMask, End IPv4, Account, Cost Center and Date can all be searched by choosing an operator and entering a value.
Pressing the "Confirm" button will list the matched IPv4 allocations.
- Add - The "Add" button will expand the panel to allow data entry. Enter in the start and end ipv4 address together with a corresponding account and cost center.
Pressing the "Confirm" button will add the entered IPv4 allocation.
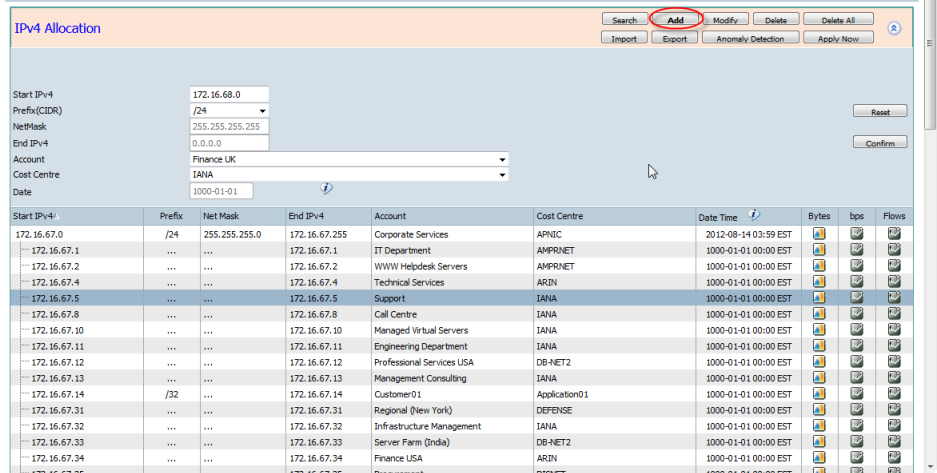
The end ipv4 will be calculated automatically if a prefix (CIDR) or netmask is entered
An error message will be displayed if one range overlaps another
- Modify - Highlight an IPv4 allocation using your mouse and then clicking the "Modify" button allows the selected IPv4 allocation to be edited.
Pressing the "Confirm" button will update the selected IPv4 allocation.
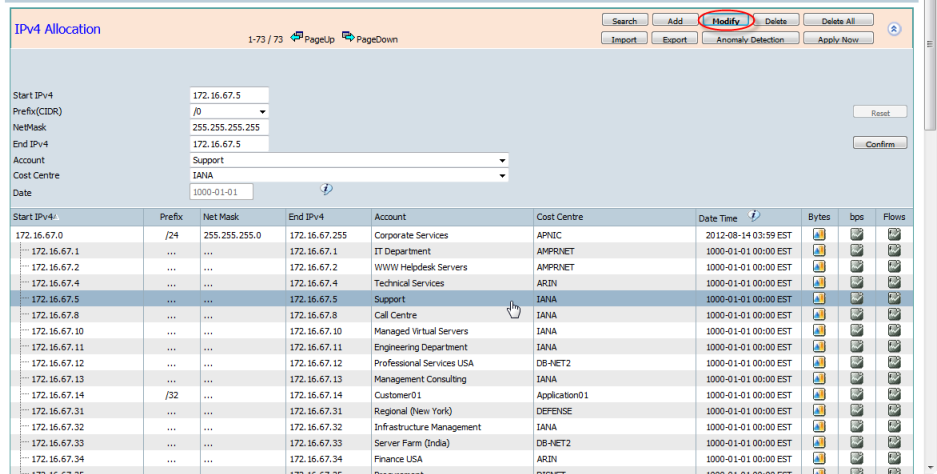
The end ipv4 will be calculated automatically if a prefix (CIDR) or netmask is entered
An error message will be displayed if one range overlaps another
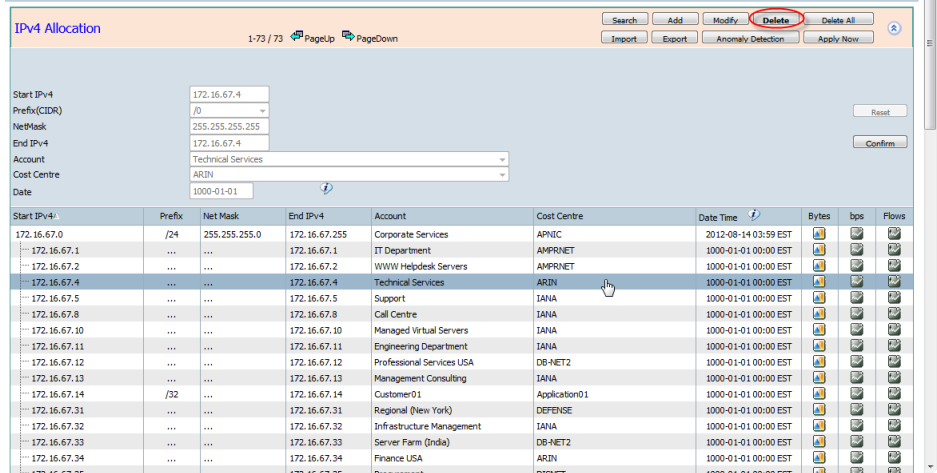
- Delete - Highlight an IPv4 allocation using your mouse and then clicking the "Delete" button allows the selected IPv4 allocation to be Deleted.
Pressing the "Confirm" button will Delete the selected IPv4 allocation.
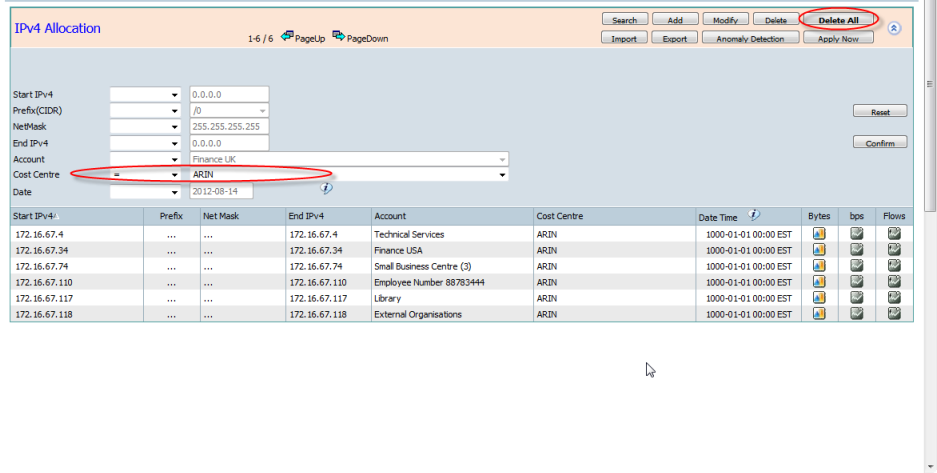
- Delete All - "Delete All" will expand the Search panel. The search allows you to define the criteria of the IPv4 allocations you wish to delete.
Pressing the "Confirm" button will Delete All the matched IPv4 allocations.
- Import - the "Import" button allows you to import pre-prepared IP Allocations. Allocations are required to be in a CSV file in one of the supported formats:
- Start IPv4, Netmask, Account Name
- Start IPv4, Netmask, Account Name, Cost Center Name
- Start IPv4, Prefix (CIDR), Account Name
- Start IPv4, Prefix (CIDR), Account Name, Cost Center Name
- Start IPv4, End IPv4, Account Name
- Start IPv4, End IPv4, Account Name, Cost Center Name
- Start IPv4, End IPv4, Account ID, Account Name, Cost Center ID, Cost Center Name
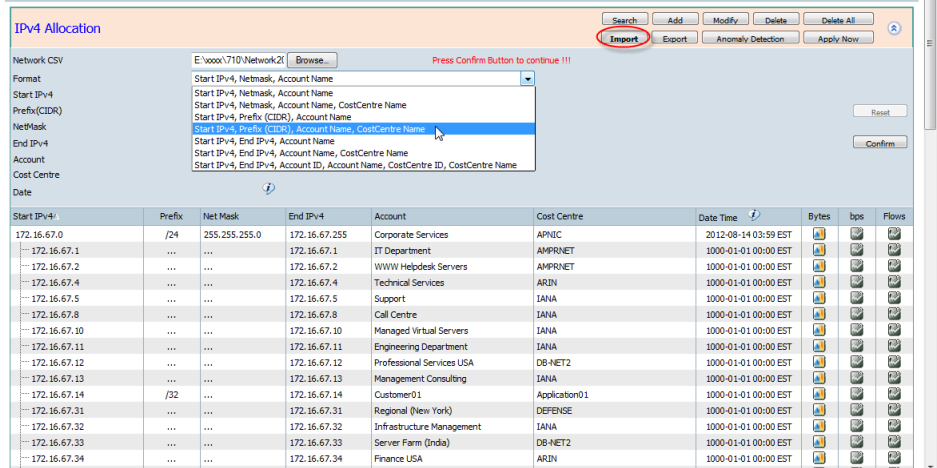
Account and Cost Center in the imported CSV file will be added automatically if they do not exist. You can use your own numeric Account and Cost Center ID's to correlate with other integrated systems.
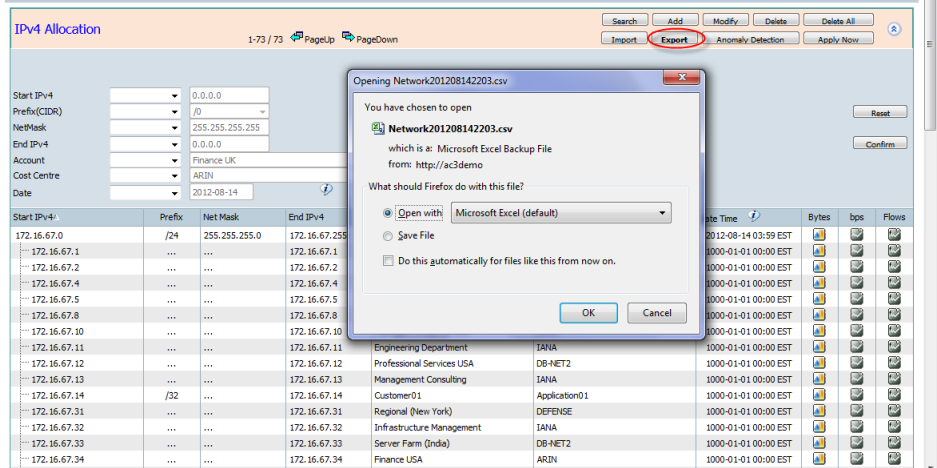
- Export - the "Export" button generates a CSV file of the current IPv4 Allocations
then press "Confirm" button to export all IPv4 allocations to a csv file.
The exported csv file format is "Start IPv4, End IPv4, Account ID, Account Name, Cost Center ID, Cost Center Name".
The Account ID and Cost Center ID are automatically generated by CySight.

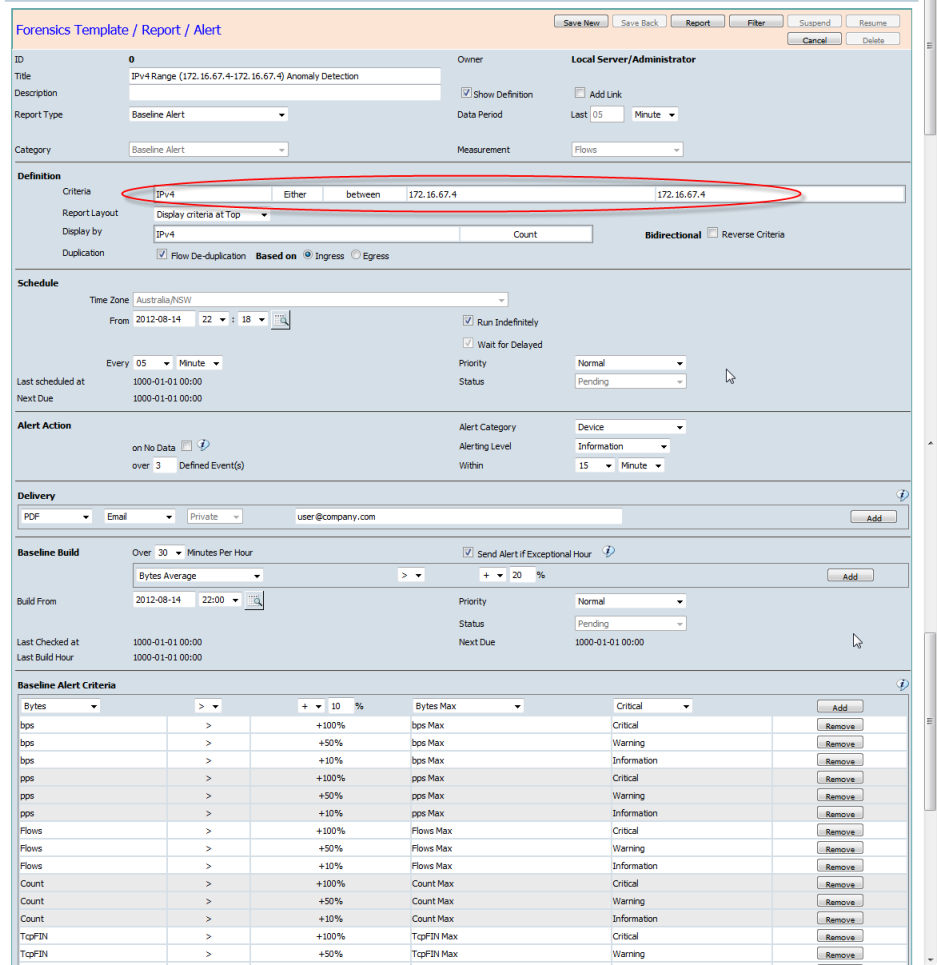
- Anomaly Detection - Highlight an IPv4 Allocation using your mouse and then clicking the "Anomaly Detection" button allows the selected IPv4 Allocation to begin generating a Baseline Alert for the highlighted IPv4 Allocation.
Pressing the "Confirm" button will Enter the Forensics Template / Report / Alert Screen from where a simple "SaveNew" is all thats needed for CySight to begin learning and alerting Intelligent Baselines. See Forensics: 7. Creating Anomaly Detection Baseline Alerts and Forensics: 6. NBAD - Anomaly Detection Baseline Alerting.
- Apply Now - Click the "Apply Now" button, then press "Confirm" button to apply the changed IPv4 Allocations. After "Apply Now" the data will begin to be tagged with the new or updated Account and Cost Center.
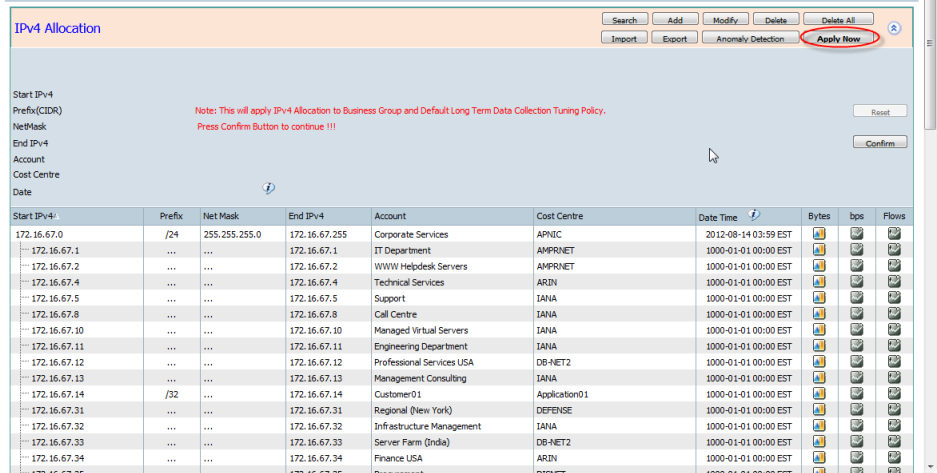
"Apply Now" will also change the default trending data collection tuning rule. More advanced CySight admins may choose to use their own trending rules rather than the default automatically generated rules.
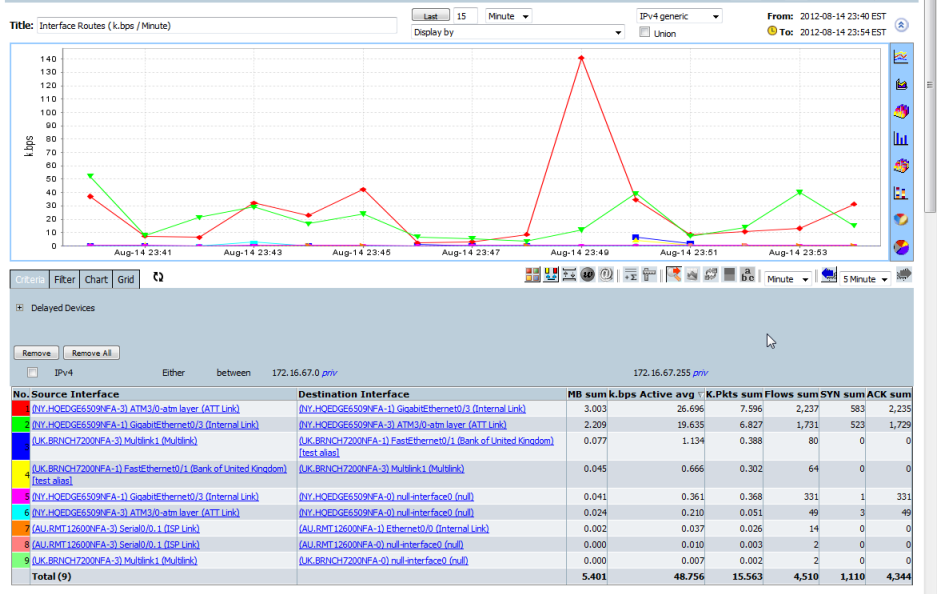
Clicking on the icons in the right columns allows drill down to an Interface Route view of the forensics screen with the corresponding IPv4 Allocation as the Criteria.