The Template can be added to the right-click popup drill-down menu.
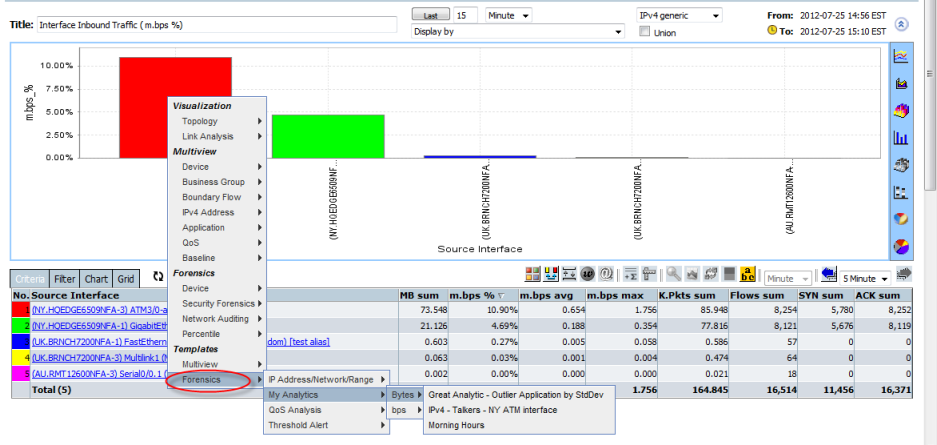
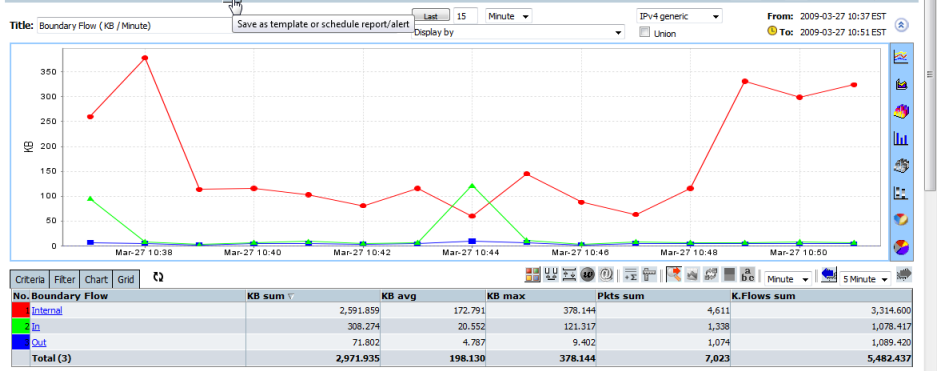
Click the top toolbar "Save" button in "Forensics" or "Custom Forensics" screen to save the defined "Forensics" as a Template.
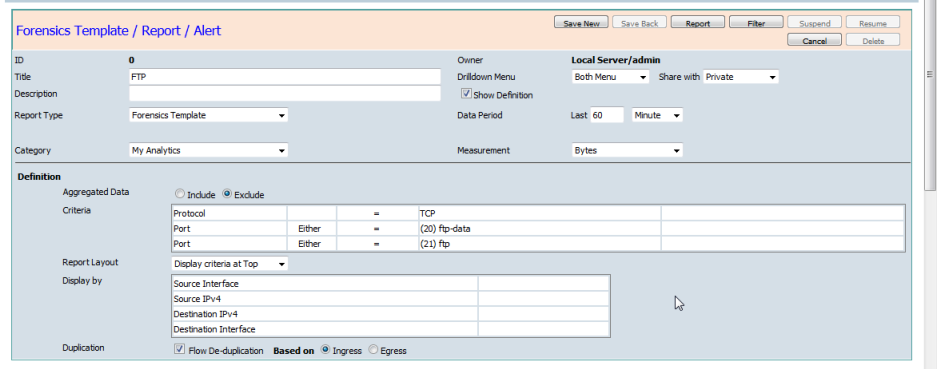
Command Buttons
- Save New - Save as a new Template. Where the Template is based on an existing template the original Template will not be changed.
- Save Back - Save back to the original Template after modifying some options.
- Report - Go back to Forensics screen to check or adjust the "Forensics" options.
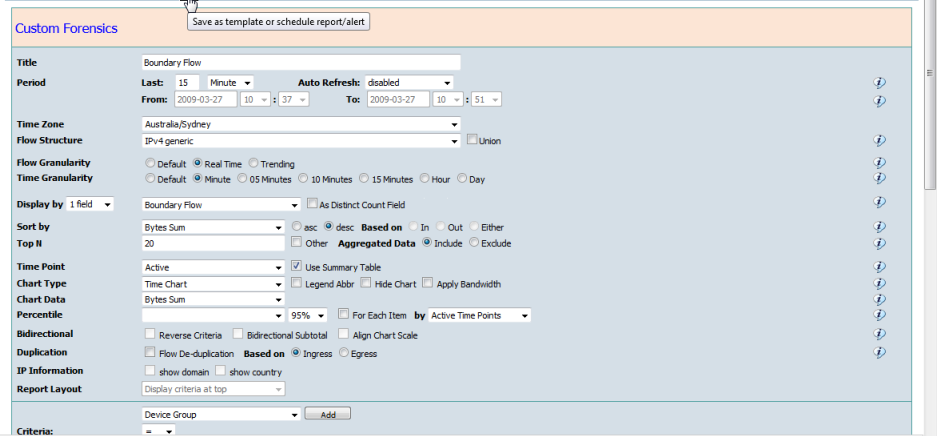
- Filter - Go back to "Custom Forensics" to adjust the "Forensics" options.
- Cancel - Go back to the previous page.
- Delete - Delete the Template if it exists.
Name of the Forensics Template and popup menu item.
Description
Additional information for the Template.
Report Type
Choose "Forensics Template" to save as a Template.
Other available options allow you to save this report as a Template, a Scheduled Report, a Threshold Alert or an Intelligent Baseline Anomaly Detection Alert.
Category
Defines the sub-menu in right-click popup menu that this Template belongs to.
The category can be added in the "Report Category" screen, which can be entered by clicking the left menu "Category" under Report Administration in the "My Analytics" panel.
Drilldown menu
"Real Time" or/and "Trending" Forensics, Multiviews and Visualizations allow Templates to be accessible via the popup menu.
- Not in Menu - This Template will not be added to the popup menu in Forensics, Multiview and Visualization screen.
- Real Time Only - Only add this Template to the popup menu in "Real Time" Forensics, Multiview and Visualization screen.
- Trending Only - Only add this Template to the popup menu in "Trending" Forensics, Multiview and Visualization screen.
- Both Menu - add this Template to the popup menu in "Real Time" and "Trending" Forensics, Multiview and Visualization screen.
Define this Template share level for the popup menu in Forensics, Multiview and Visualization screen and the visibility in "Forensics Templates" screen.
- Private - Only add this Template to the popup menu in Forensics, Multiview and Visualization screen for the Owner.
- Administrators - Add this Template to the popup menu in Forensics, Multiview and Visualization screen for the Owner and Administration user.
- Operators - Add this Template to the popup menu in Forensics, Multiview and Visualization screen for the Owner and Administration users and Operation users.
- Customers - Add this Template to the popup menu in Forensics, Multiview and Visualization screen for all Customer users.
Data Period is set to the default time period when returning to "Forensics" or "Custom Forensics" screen from the "Forensics Templates" screen.
Measurement
If the measurement is saved as "Dynamic" the popup menu will follow the current report traffic measurement. e.g If Sort order is by flows the resulting Template will be in flows sort order.
If the measurement is of a fixed measurement type the popup menu will add an additional level sub-menu for that specified measurement type and the resulting report will order by the specified traffic measurement.
Definition
The following options in "Custom Forensics" and "Forensics" Filter tab can be overwritten here.
- "Aggregated Data",
- "Report Layout" and
- "Duplication"
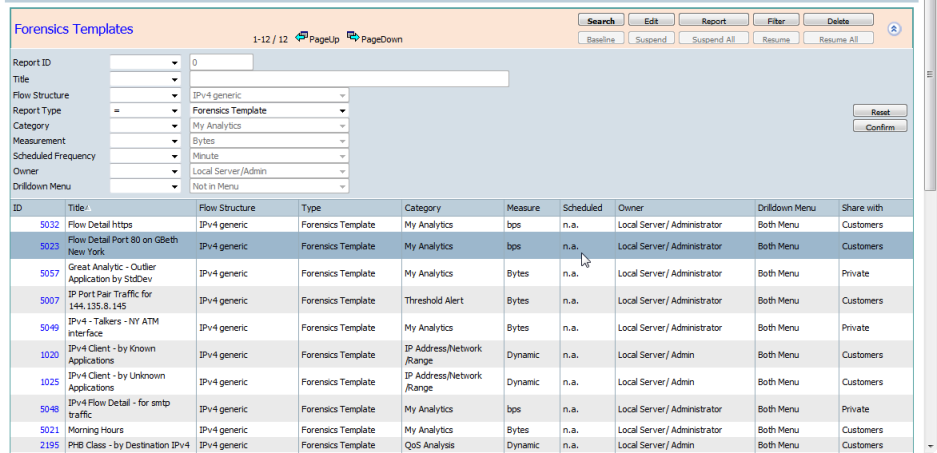
Clicking on the left menu "Forensics" under "Templates" in "My Analytics" will list all generated Forensics Templates in "Forensics Templates" screen.
Command Buttons
The "Forensics Templates" screen allows maintenance operations on the existing Forensics Templates. The bold button reflects the current command status.
- Search - Click the "Search" button to expand the fields panel. Choose operator and enter value, then press "Confirm" button to list the matched Templates.
- Edit - Click the "Edit" button and highlight a Template in the grid, then press "Confirm" to modify the Template.
- Report - Click the "Report" button and highlight a Template in the grid, then press "Confirm" to go to Forensics Report to check or adjust the "Forensics" options.
- Filter - Click the "Filter" button and highlight a Template in the grid, then press "Confirm" to go to "Custom Forensics" to adjust the "Forensics" options and criteria.
- Delete - Click the "Delete" button and highlight a Template in the grid, then press "Confirm" to delete the highlighted Template.
If the Forensics or "Custom Forensics" screen has been opened from a Template then clicking on the toolbar "Save" button allows the Template to be Saved as a New Template or Saved Back with the Modified options and criteria.