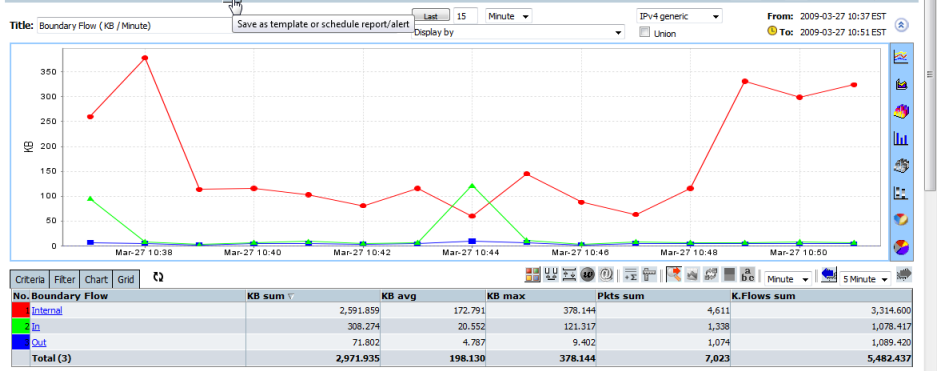
Click the top toolbar "Save" button in "Forensics" or "Custom Forensics" screen to save the customized "Forensics" as a Schedule Report.
Command Buttons
- Save New - Save as a new Schedule Report. Where the Schedule Report is based on an existing Schedule Report the original Schedule Report will not be changed.
- Save Back - Save back to the original Schedule Report after modifying some options.
- Report - Go back to Forensics screen to check or adjust the "Forensics" report options.
- Filter - Go back to "Custom Forensics" to adjust the "Forensics" report options.
- Suspend - Suspend this Schedule Report.
- Resume - Recover running this Schedule Report.
- Cancel - Go back to the previous page.
- Delete - Delete this schedule if it exists.
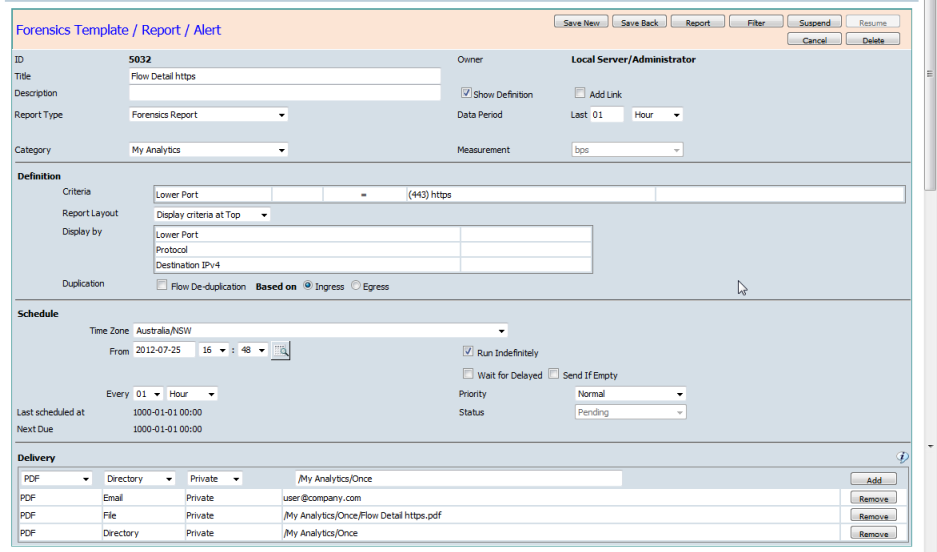
Name of the Scheduled Report.
Description
Additional information for the Schedule Report.
Report Type
Choose "Forensics Report" to save as a Schedule Report.
Other available options allow you to save this report as a Template, a Scheduled Report, a Threshold Alert or an Intelligent Baseline Anomaly Detection Alert.
Category
Define a category for the Schedule Report.
The category can be added in the "Report Category" screen, which can be entered by clicking the left menu "Category" under Report Administration in the "My Analytics" panel.
Add Link
Enabling the "Add Link" option will add an icon to the generated report. The icon provides a click back link to the "Forensics" screen from the generated report.
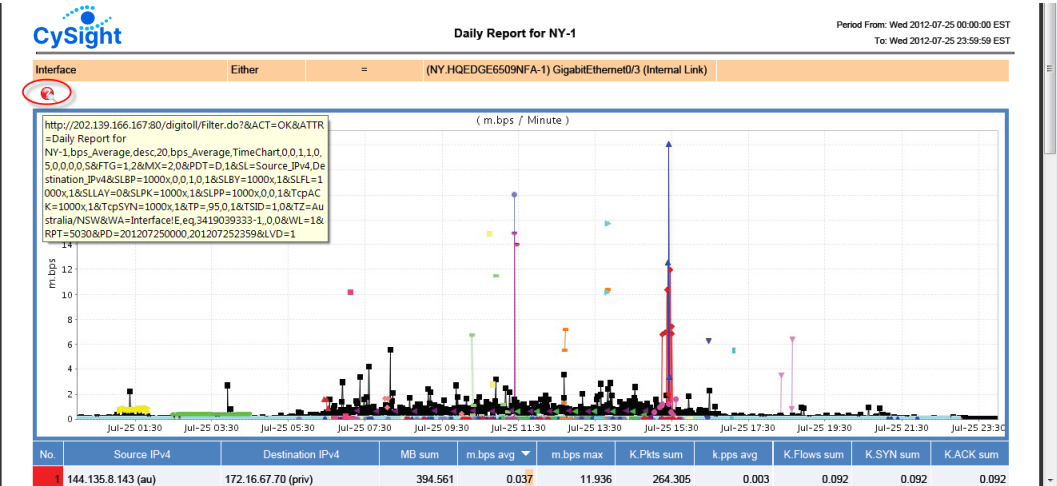
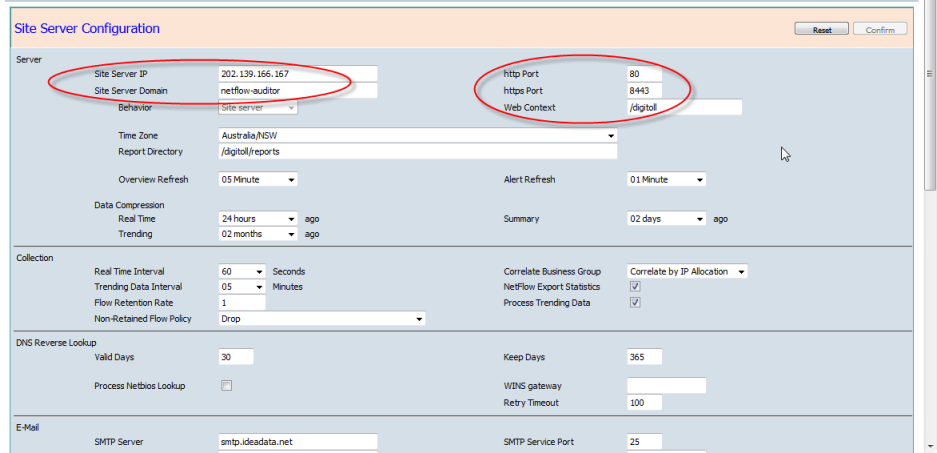
In order for the click back to function correctly the server must be correctly configured in the "Site Configuration" screen under "Administrator" in the "Configuration" panel.
Data Period
Defines the Interval of the scheduled report.
Available options are;
- minute,
- hour,
- day,
- week,
- month
- year
- quarter
- Period
Where Period is selected please choose the exact time period between Period From and Period To. For a specified Period the schedule frequency can only be produced "Once".
Note that this is NOT the Frequency of the report. The Frequency can be specified under the Schedule section and change the "Every" N Frequency. An Interval is the period of data the report covers.Definition
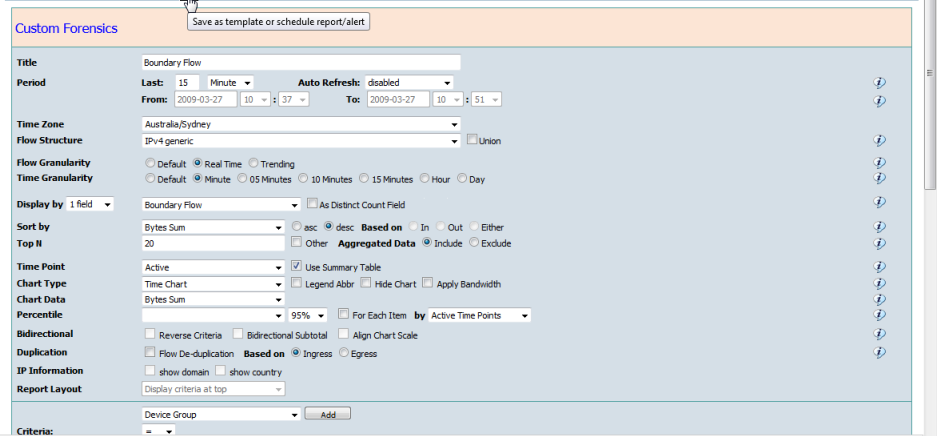
The following options in "Custom Forensics" and "Forensics" Filter tab can be overwritten here.
- "Aggregated Data",
- "Report Layout" and
- "Duplication"
Generate the Schedule Report from the default time zone or a different time zone perspective.
Schedule From
Define the schedule start time point.
Schedule To
Define the schedule end time point.
Available if "Run Indefinitely" is un-ticked.
Run Indefinitely
The Schedule Report will keep running indefinitely if it is ticked on.
Wait for Delayed
When the report includes multiple devices/exporters (routers or switches), the Schedule Report will be delayed to run until all active device data has reached the scheduled time points. This is to ensure that billing reports maintain integrity when dependent on multiple inputs.
Send if Empty
If enabled an empty report will be generated if there is no data matching report time period.
Priority
Define the priority of the Schedule Report.
Delivery
Forensics Schedule Report can be PDF, CSV and HTML formats.
The generated report can be sent to one or more email addresses.
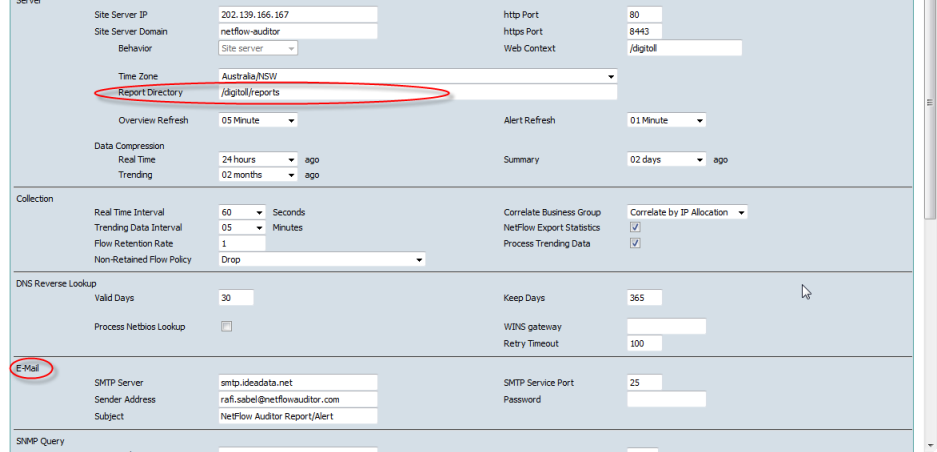
The SMTP server and its service port, sender address and subject must be configured properly to allow send Schedule Report.
The Schedule Report can be specified to save to a directory in the Report Repository with each scheduled time stamp as the report name affix or copied to a specified report name in the report repository for viewing or to enable other applications to refer to the automatically refreshed file.
The location of repository is defined by "Report Directory" in above "Site Configuration".
Delivery to "Directory" and "File" have 3 shared attribute options.
- Private - only allows the report Owner and Administrator to browse the report in the Report Repository.
- Shared - allows any user who is logged into CySight to browse the report.
- Public - allows anyone to browse the given report using a specified URL without being logged into CySight.
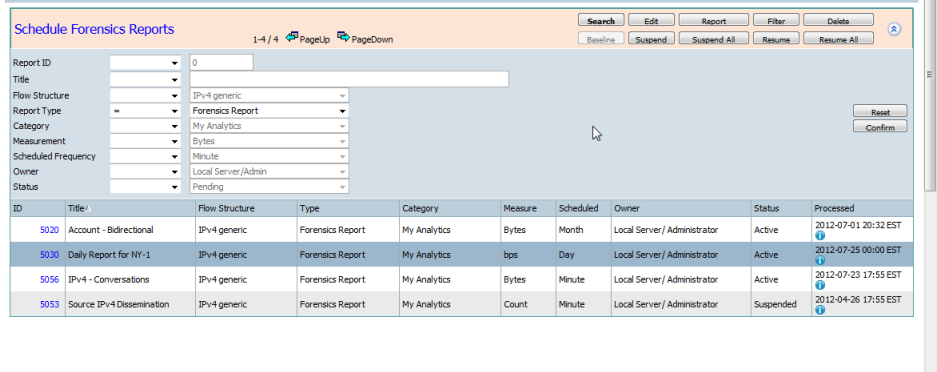
Clicking on the left menu "Schedule Forensics" under "Report Administration" in "My Analytics" will list all the Forensics Schedule Reports in "Forensics Schedule Reports" screen.
Command Buttons
The "Forensics Schedule Reports" screen allows maintenance operations on the existing Forensics Schedule Reports. The bold button reflects the current command status.
- Search - Click the "Search" button to expand the fields panel. Choose operator and enter value, then press "Confirm" button to list the matched Schedule Reports.
- Edit - Click the "Edit" button and highlight a Schedule Report in the grid, then press "Confirm" to modify the Schedule Report.
- Report - Click the "Report" button and highlight a Schedule Report in the grid, then press "Confirm" to go to Forensics Report to check or adjust the "Forensics" options.
- Filter - Click the "Filter" button and highlight a Schedule Report in the grid, then press "Confirm" to go to "Custom Forensics" to adjust the "Forensics" options and criteria.
- Delete - Click the "Delete" button and highlight a Schedule Report in the grid, then press "Confirm" to delete the highlighted Schedule Report.
- Suspend - Click the "Suspend" button and highlight a Schedule Report in the grid, then press "Confirm" to suspend the highlighted Schedule Report.
- Suspend All - Click the "Suspend All" button, then press "Confirm" to suspend all current listed Schedule Reports.
- Resume - Click the "Resume" button and highlight a Schedule Report in the grid, then press "Confirm" to resume highlighted Schedule Report.
- Resume All - Click the "Resume All" button, then press "Confirm" to resume all current listed Schedule Reports.
If the Forensics or "Custom Forensics" screen has been opened from a Schedule Report then clicking on the toolbar "Save" button allows the Schedule Report to be Saved as a New Schedule Report or Saved Back with the Modified options and criteria.